
Layouts are per screen, so the main hall and the foyer can look completely different. Nothing you do here reaches the wall until you press Publish changes, so it is safe to experiment.
Open the designer for one screen #
Go to Screens and choose Design on the card of the screen you want to change. A screen that has never been designed tells you so: This screen uses the default layout, with two ways forward - Start from a preset or Blank grid. Both do the same underlying thing, which is turn the standard dashboard into zones you are allowed to move.
Start from a preset #
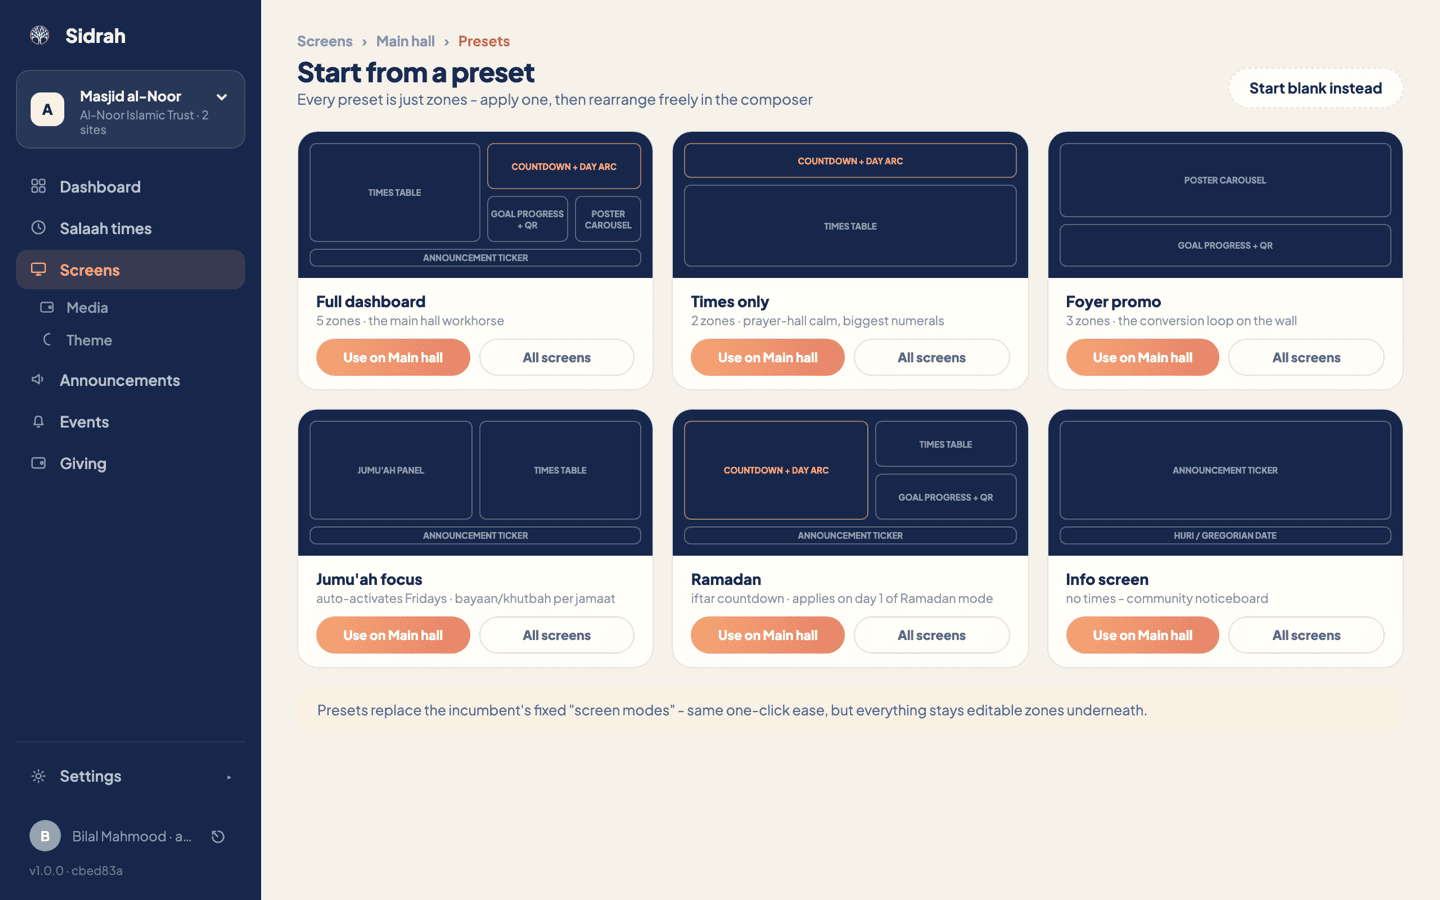
The presets gallery gives you six tested starting points, each shown as a small diagram of its zones:
- Full dashboard - five zones, the main hall workhorse.
- Times only - two zones, prayer-hall calm and the biggest numerals.
- Foyer promo - three zones, the conversion loop on the wall.
- Jumu'ah focus - auto-activates on Fridays, with bayaan and khutbah per jamaat.
- Ramadan - iftar countdown, applied on day one of Ramadan mode.
- Info screen - no times at all, a community noticeboard.
Each card offers Use on that screen, or All screens if you want every display in the masjid to start from the same place. Prefer a clean sheet? Start blank instead sits at the top right.
Add zones from the library #
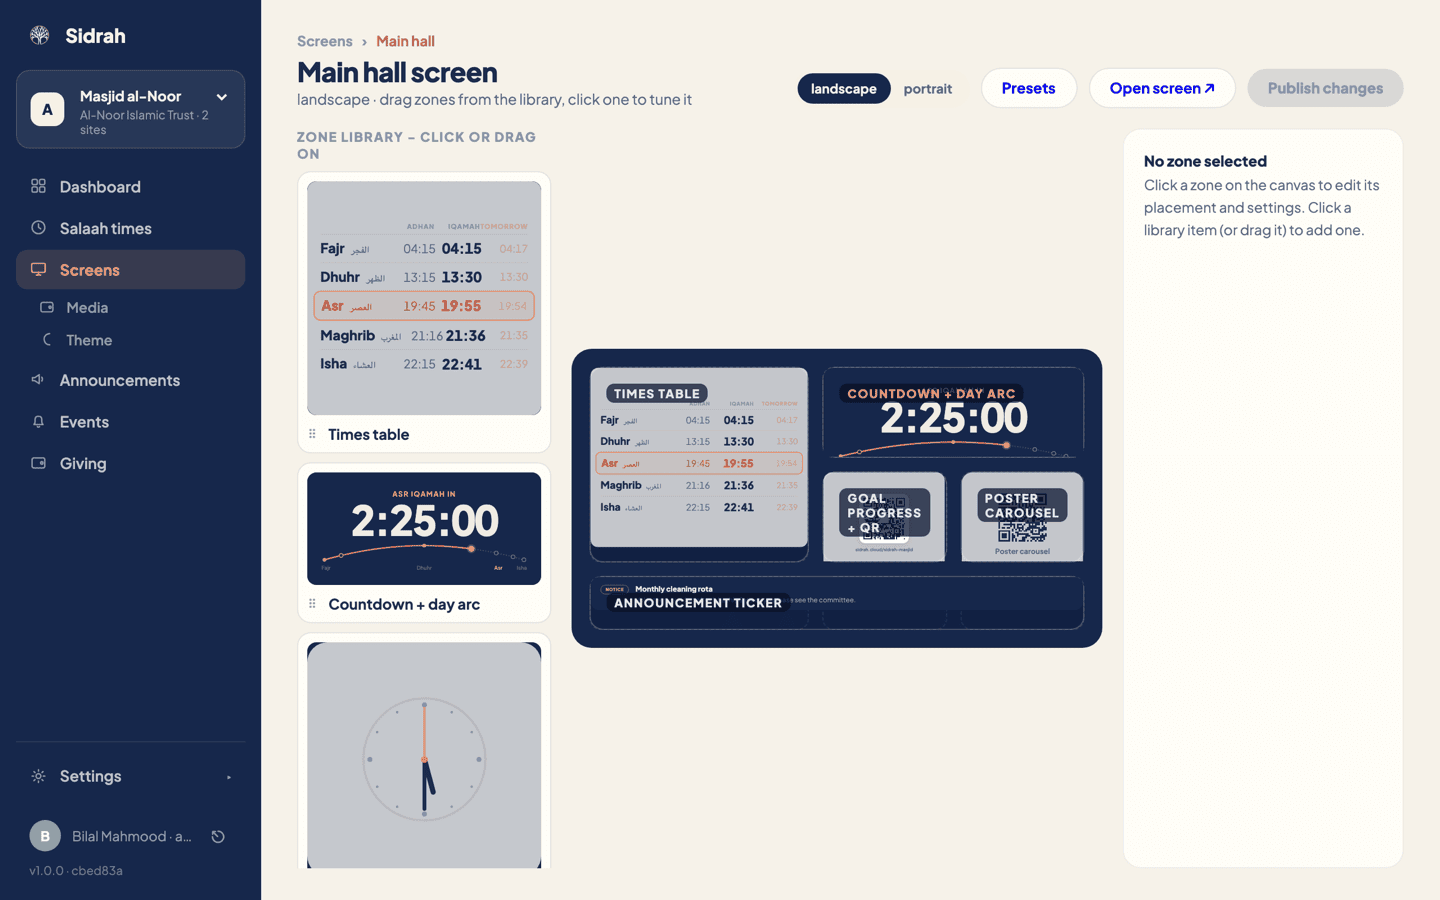
The composer has three columns: the zone library on the left, the canvas in the middle, and the settings for whichever zone you have selected on the right. The library holds the times table, countdown with day arc, analogue clock, Hijri and Gregorian date, poster carousel, announcement ticker, goal progress with QR, and the Jumu'ah panel.
Click a library item to drop it into the first free cell, or drag it onto the exact cell you want. Each thumbnail is the real zone, so what you see in the library is what lands on the wall.
Move, resize and tune each zone #
Click a zone and it is marked SELECTED, with its controls on the right:
- Position - four arrows nudge it one cell at a time. You can also drag it to a new cell on the canvas.
- Size - Width and Height steppers. Some zones have a floor, and the panel says so plainly: the times table needs at least 2 x 2, the countdown at least 2 x 1. The minus button simply stops there, so a times table can never shrink to an unreadable smudge.
- Zone settings - the countdown offers Show day arc, the times table offers a Tomorrow column.
- Remove zone - takes it off the grid, leaving the cell free.
The canvas is a live preview, not a diagram. Zones render exactly as the TV will draw them, including anything that gets clipped when a zone is too small.
Landscape or portrait #
The landscape and portrait buttons at the top right flip the screen's orientation and lock the canvas to the true shape of the TV - 16:9 lying down, 9:16 standing up. It is the same setting as the one on the screen's card, so flipping it here flips it there too.
If your foyer TV is mounted on its side, flip to portrait before you place your zones. A layout that reads beautifully in 16:9 usually wants fewer, taller zones once it stands up.
Publish it to the wall #
Nothing has changed in the hall yet. Press Publish changes - it stays greyed out until there is something to publish - and a green Published ✓ appears. The screen picks the new layout up on its next check-in, within a minute.
To see it for yourself without walking anywhere, choose Open screen, which loads that display in a new browser tab. If a poster zone looks empty, that is expected until you have uploaded artwork.
The poster carousel zone is marked MEDIA in the library because it needs posters to show. Add them first on Screens ▸ Media, then the zone has something to rotate.